Quick Start
A guided walk-through from "never opened DataMaxi+" to "made my first read on a spread", in five minutes. Screens shown are the current redesigned UI on dev.datamaxiplus.com.
1. Sign in
The site landing page leads with a single CTA — Sign in. Click it (top-right of datamaxiplus.com) to reach the terminal login screen.
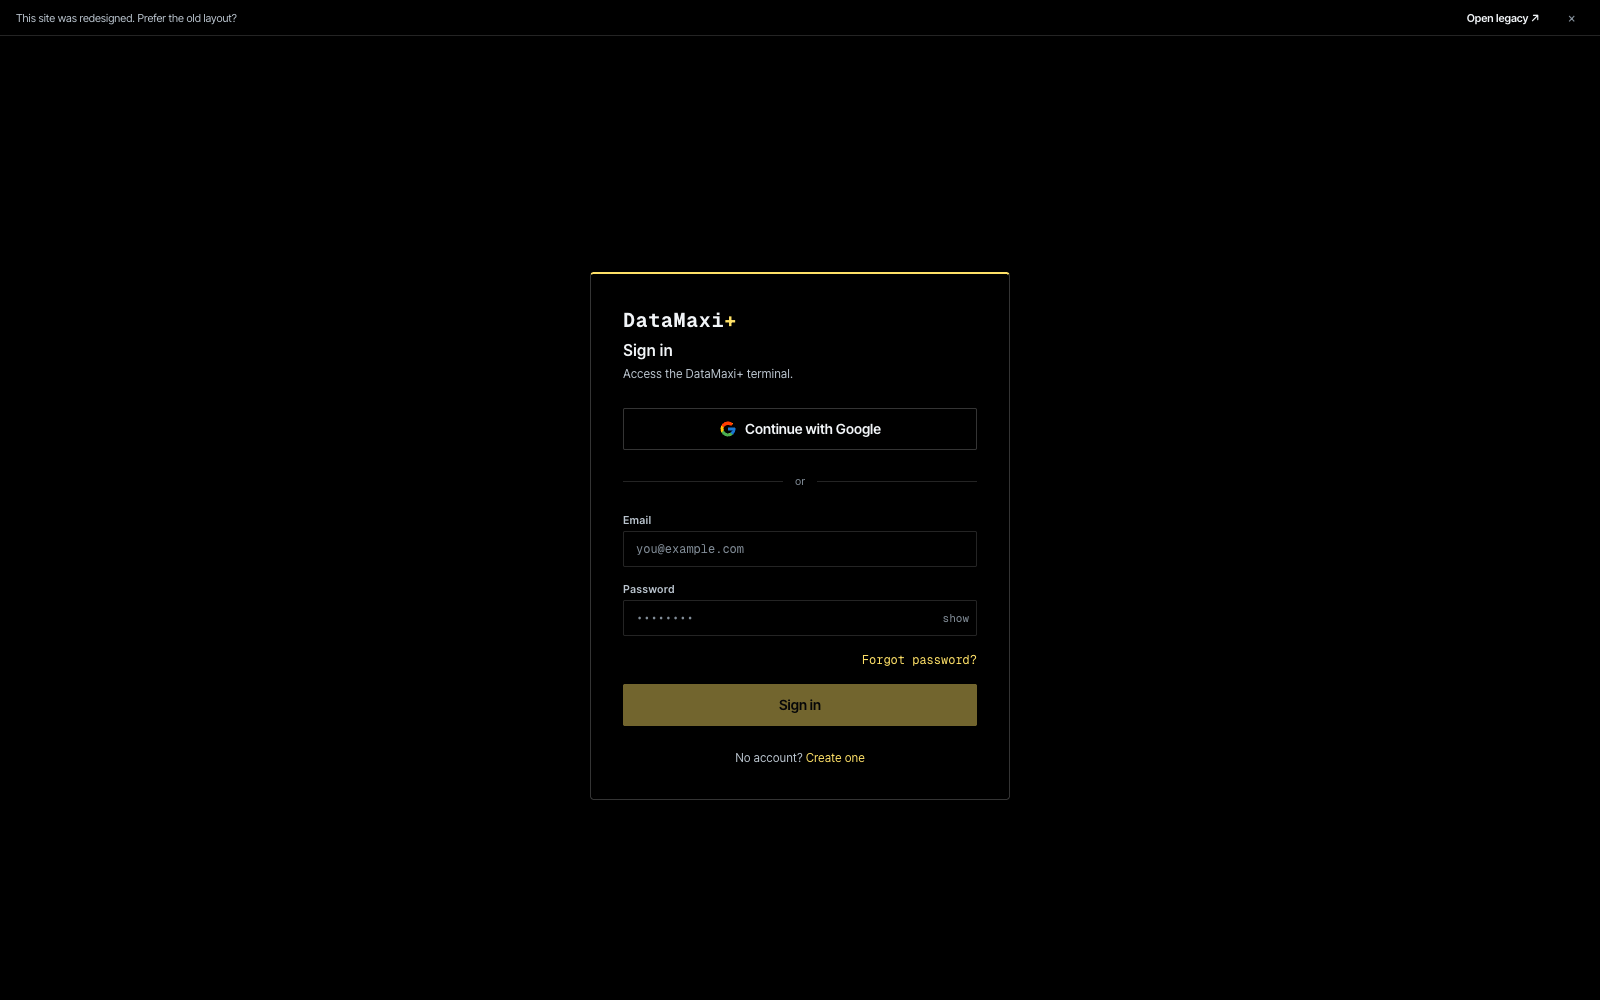
You have two ways in:
- Continue with Google — single-click OAuth, easiest for personal accounts.
- Email + Password — fill the two fields and click
Sign in. If you don't have an account yet, click Create one at the bottom; the sign-up flow uses the same shape.
Forgot your password? Use the Forgot password? link to reset by email.
After signing in you land on the Dashboard.
2. Read the Dashboard
The Dashboard is the entry screen — one-glance market read with shortcuts into every other section.
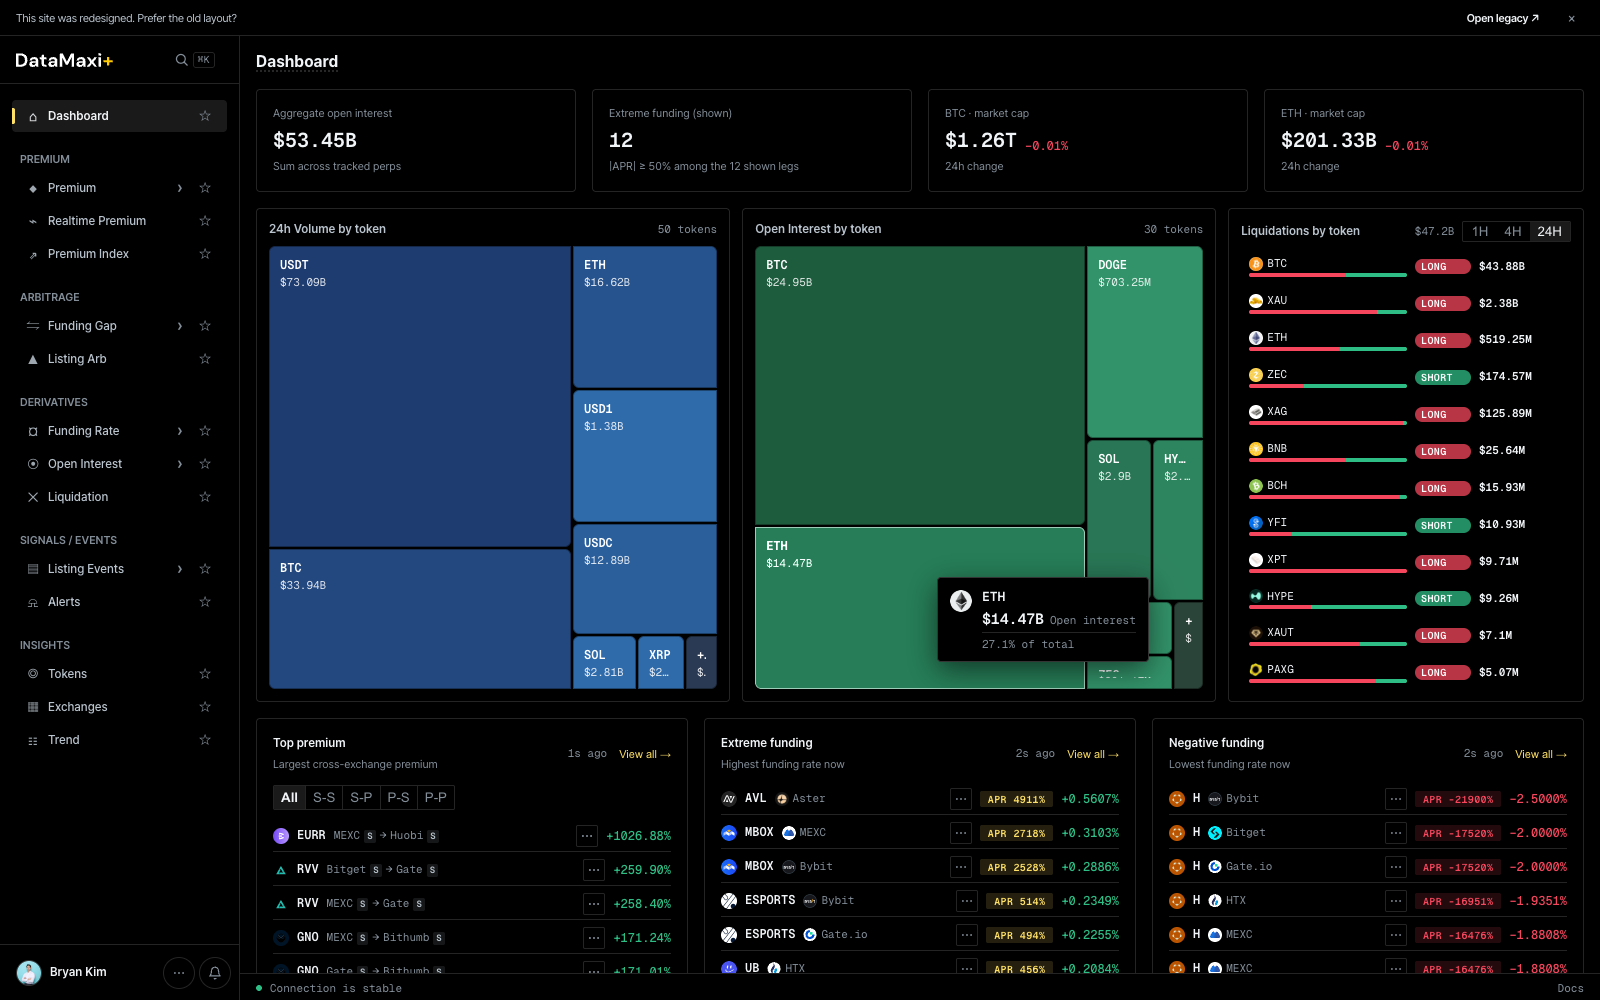
What's on it:
- Header KPIs — aggregate open interest, count of tokens at extreme funding, BTC + ETH market cap.
- 24h Volume by token (treemap, left) and Open Interest by token (treemap, center) — cell size = share, color = 24h price change.
- Liquidations by token (right rail) — window pill (
1H · 4H · 24H), long/short split per token. - Top premium · Extreme funding · Negative funding (bottom strips) — each with a
View all →jump to the deeper screen.
Use the Dashboard as your starting screen each session, then jump from a card into the matching tool.
3. Find a spread on the Premium screener
The Premium screener ranks every cross-exchange spread that matters. Open Premium from the left nav (or the Top premium → View all jump on the Dashboard).
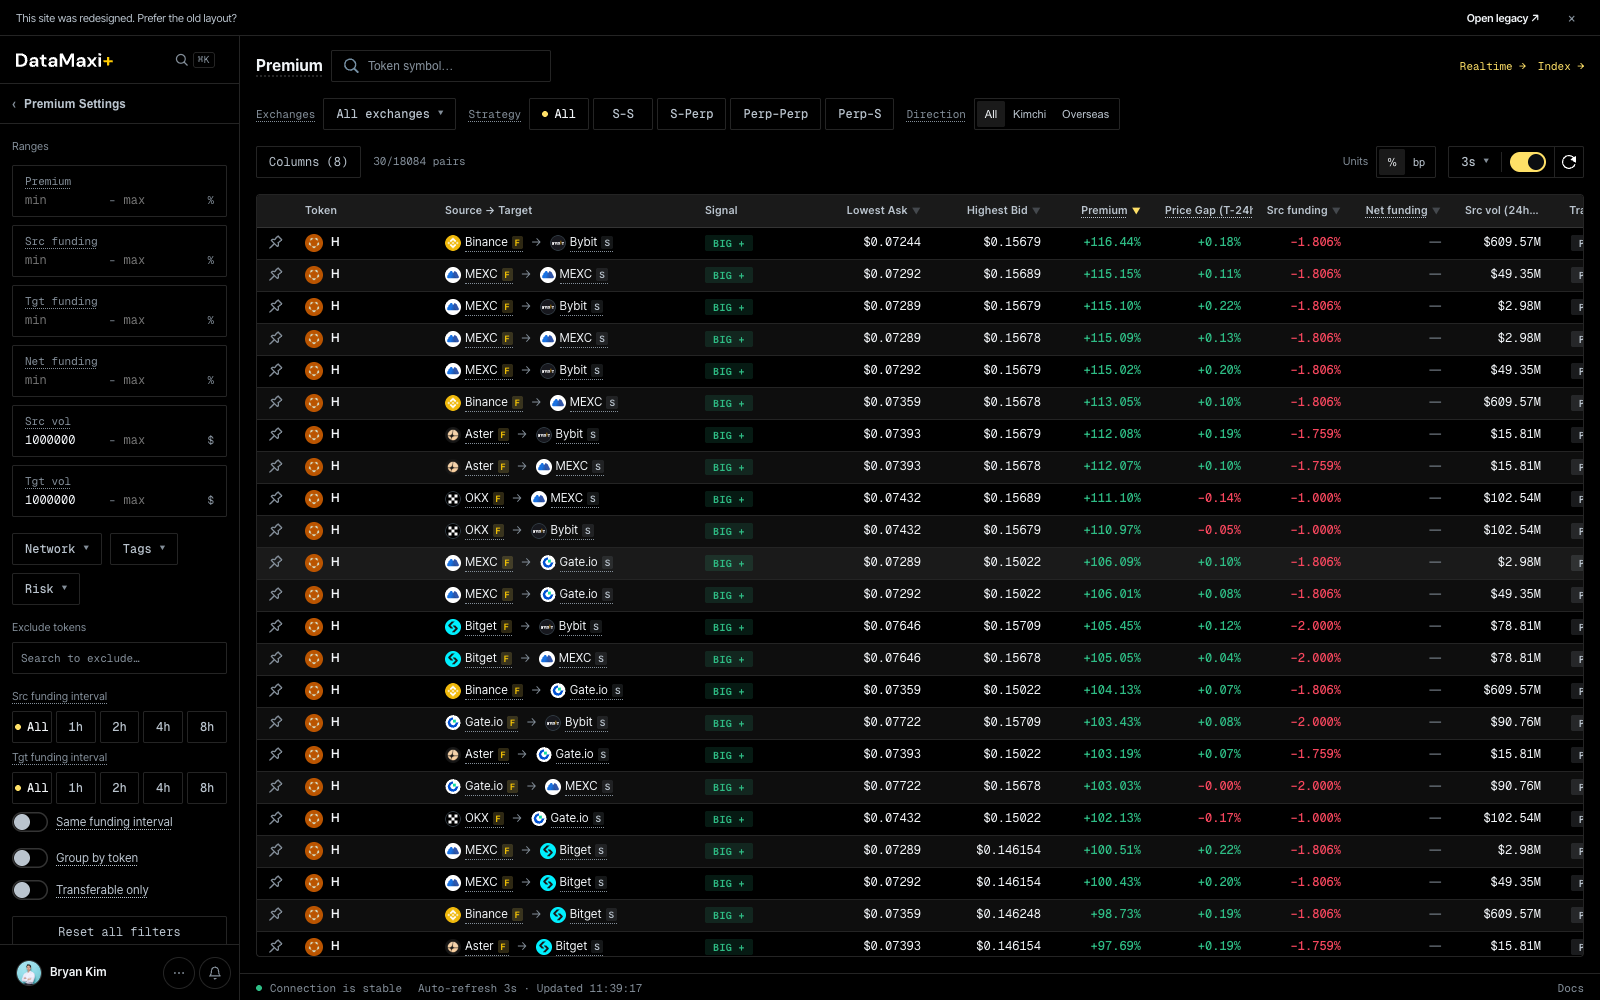
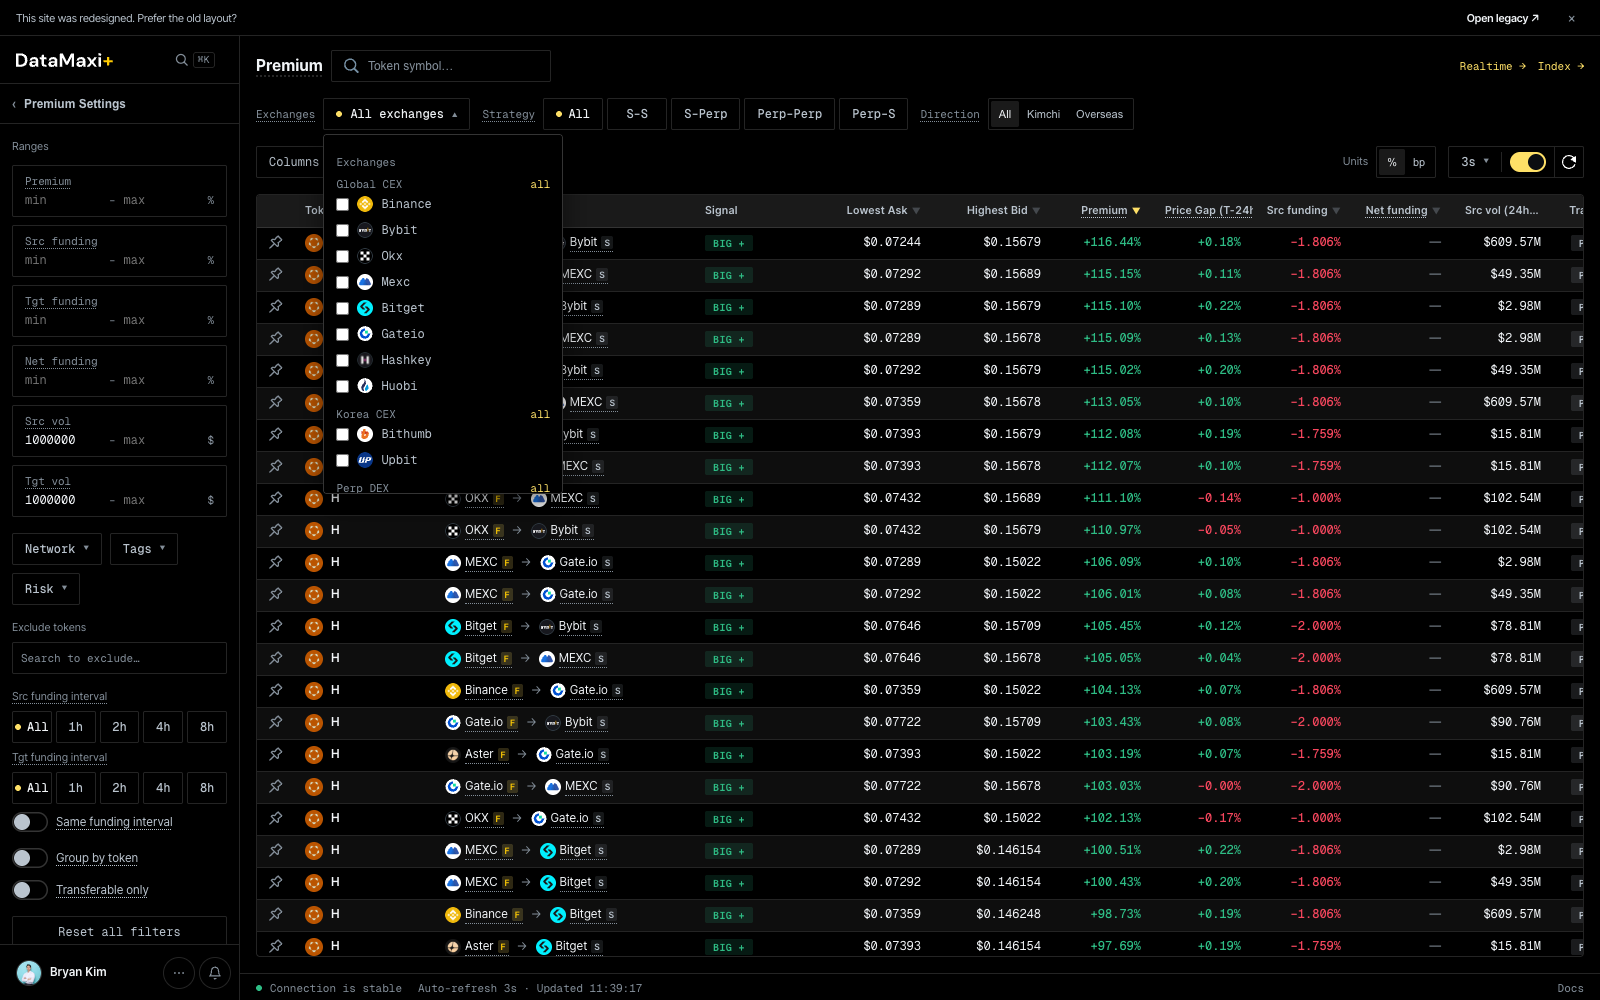
3a. Pick the venues you trade
Top-left of the table, click All exchanges ▼. Tick the venues you actually have keys / balances on — the screener filters to pairs where both legs are in your set.
3b. Pick a direction or strategy
Two pill rows above the table:
- Strategy —
All · S-S · S-Perp · Perp-Perp · Perp-S. Picks which legs are eligible (spot-spot, spot-perp, …). - Direction —
All · Kimchi · Overseas. Click Kimchi to narrow to KRW-market spreads (Upbit / Bithumb on one leg).
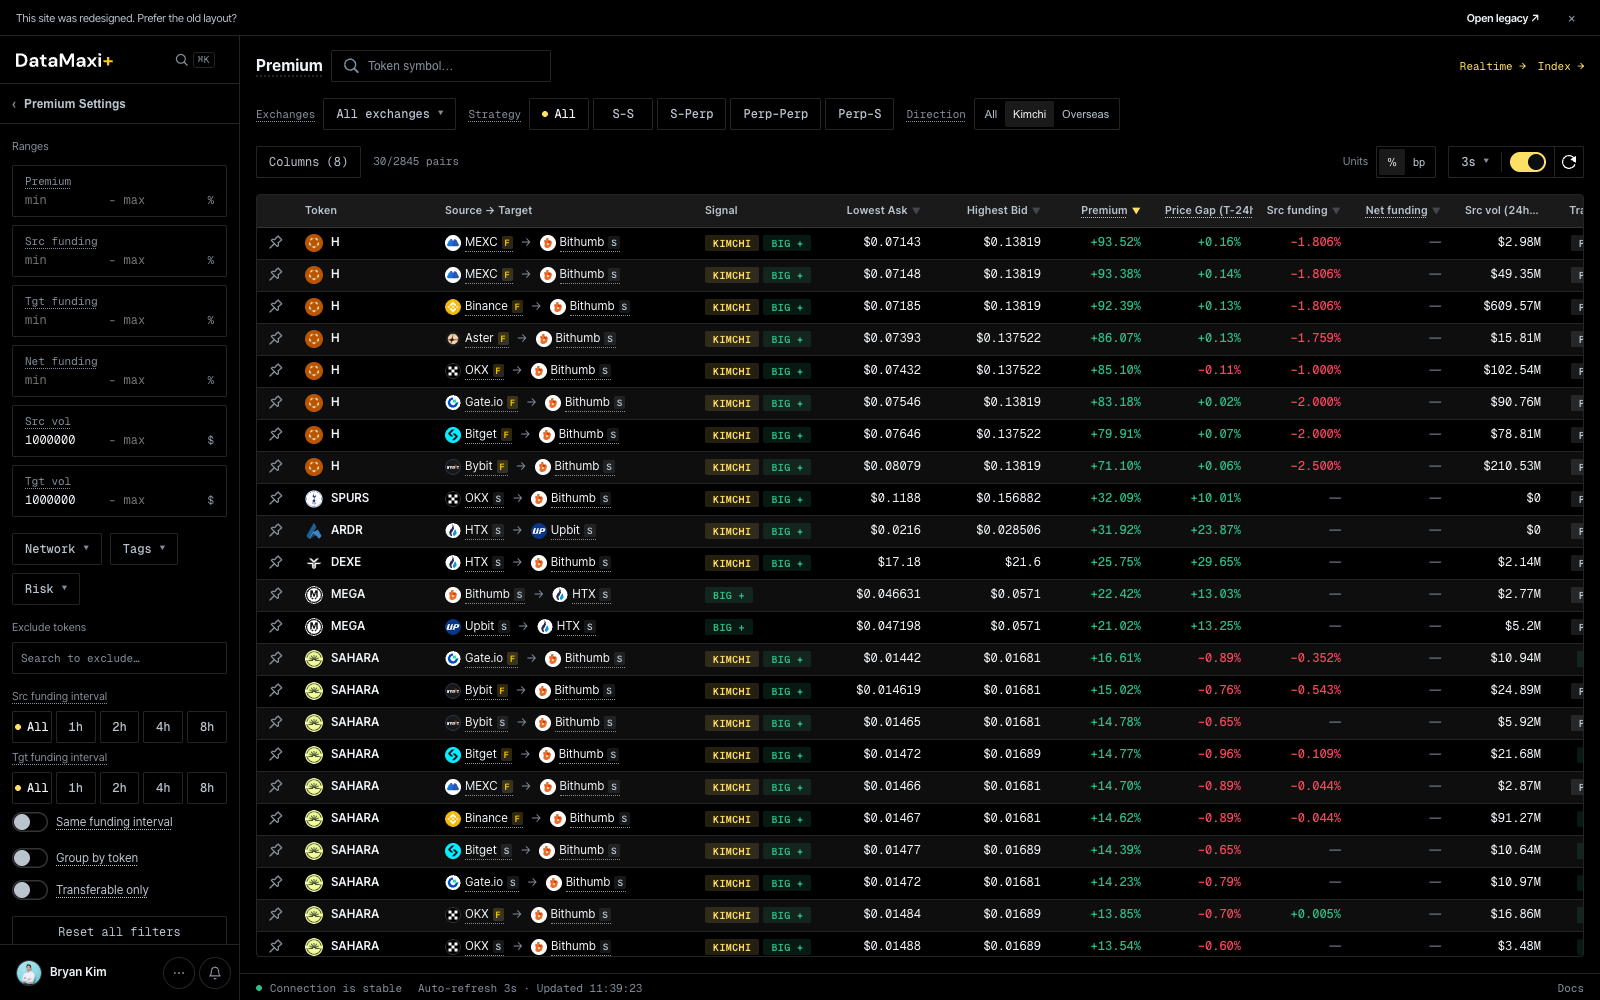
3c. Filter for what you can actually execute
Open the Premium Settings rail on the left. Useful starting filters:
- Premium ≥ 0.5% (or whatever your edge is) under Ranges.
- Src vol and Tgt vol ≥
$1,000,000to drop illiquid pairs. - Transferable only toggle at the bottom — exclude pairs where the asset can't be deposited / withdrawn on one of the venues.
The result is a short list of pairs that pass your trade rules — open the inspector on any row to commit (see Premium → Inspector).
4. Check funding-rate regime
Open Funding Rate from the left nav (Derivatives group).
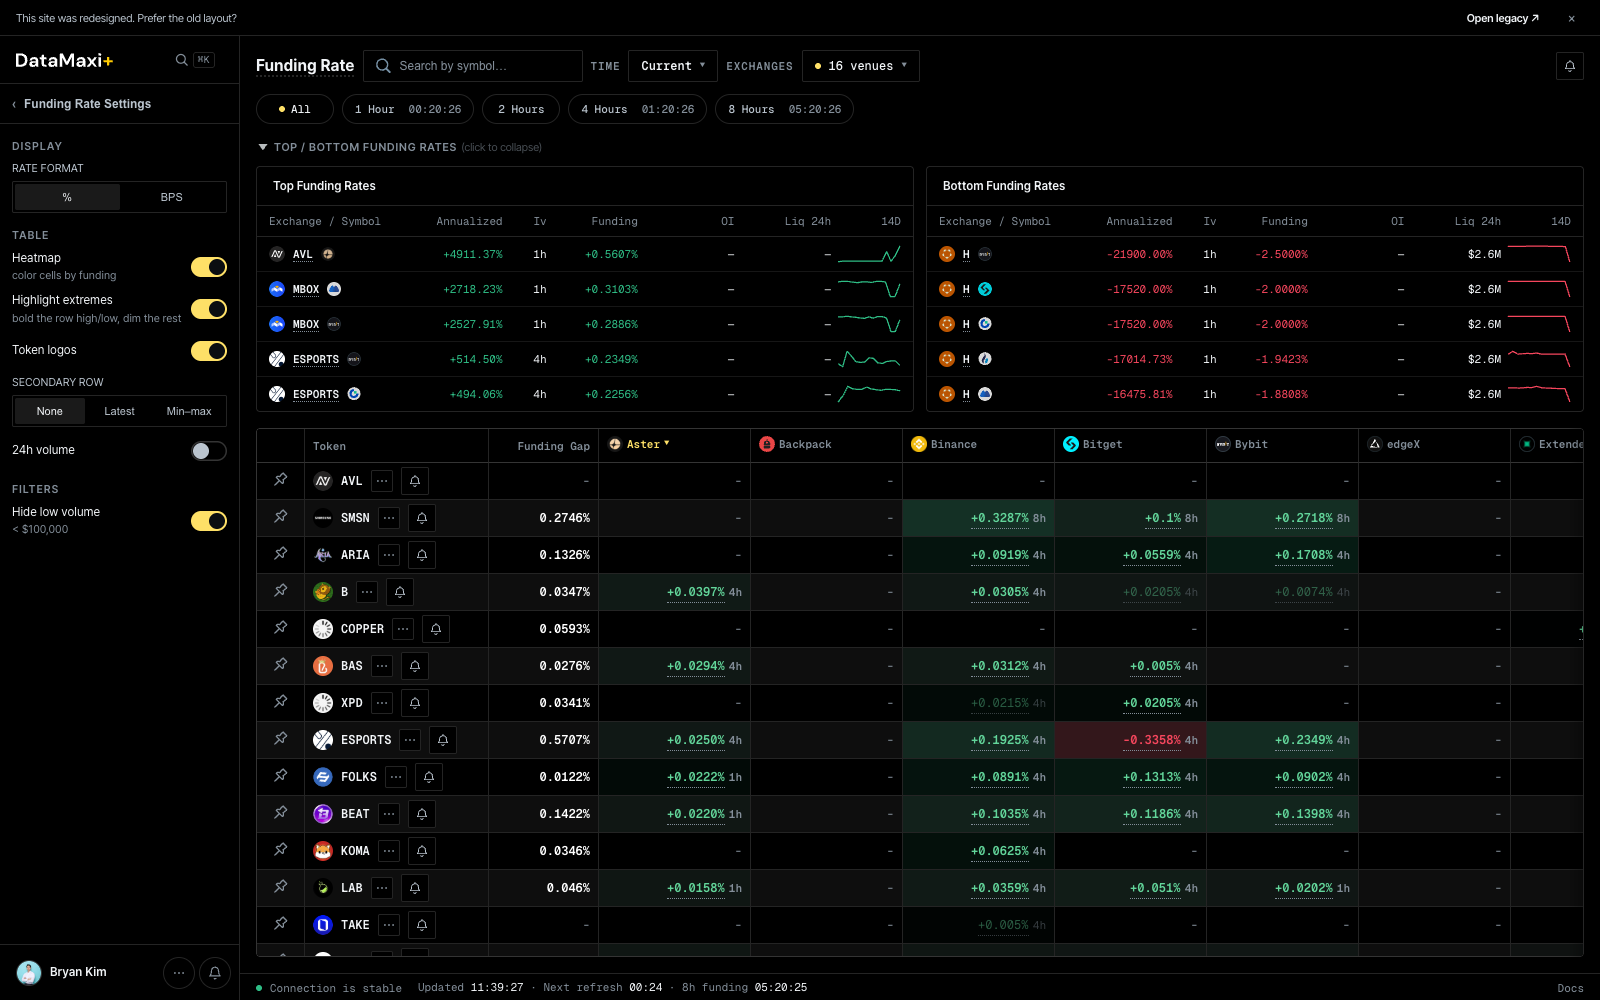
Two reads at a glance:
- Top Funding Rates / Bottom Funding Rates strips at the top — current extremes across the whole token universe. Tells you which side is paying hardest right now.
- Cross-venue grid below — one row per token, one column per venue. Sort by Funding Gap to surface the biggest carry edges instantly; pair the high-paying venue (short) with the low-paying venue (long) to collect the gap.
For a token you'd want to set up: click the row to open the inspector — per-venue rate cards + history chart.
5. Sniff for listing arbitrage
Open Listing Arb from the left nav (Arbitrage group). Three tabs along the title:
- Active — live KRW-market listings; rare but high-edge.
- Historical — every past listing, ranked by post-listing move. Use this to size what's normal.
- Expected — listings that haven't gone live yet — pre-position keys, balances, and bots before the announcement lands.
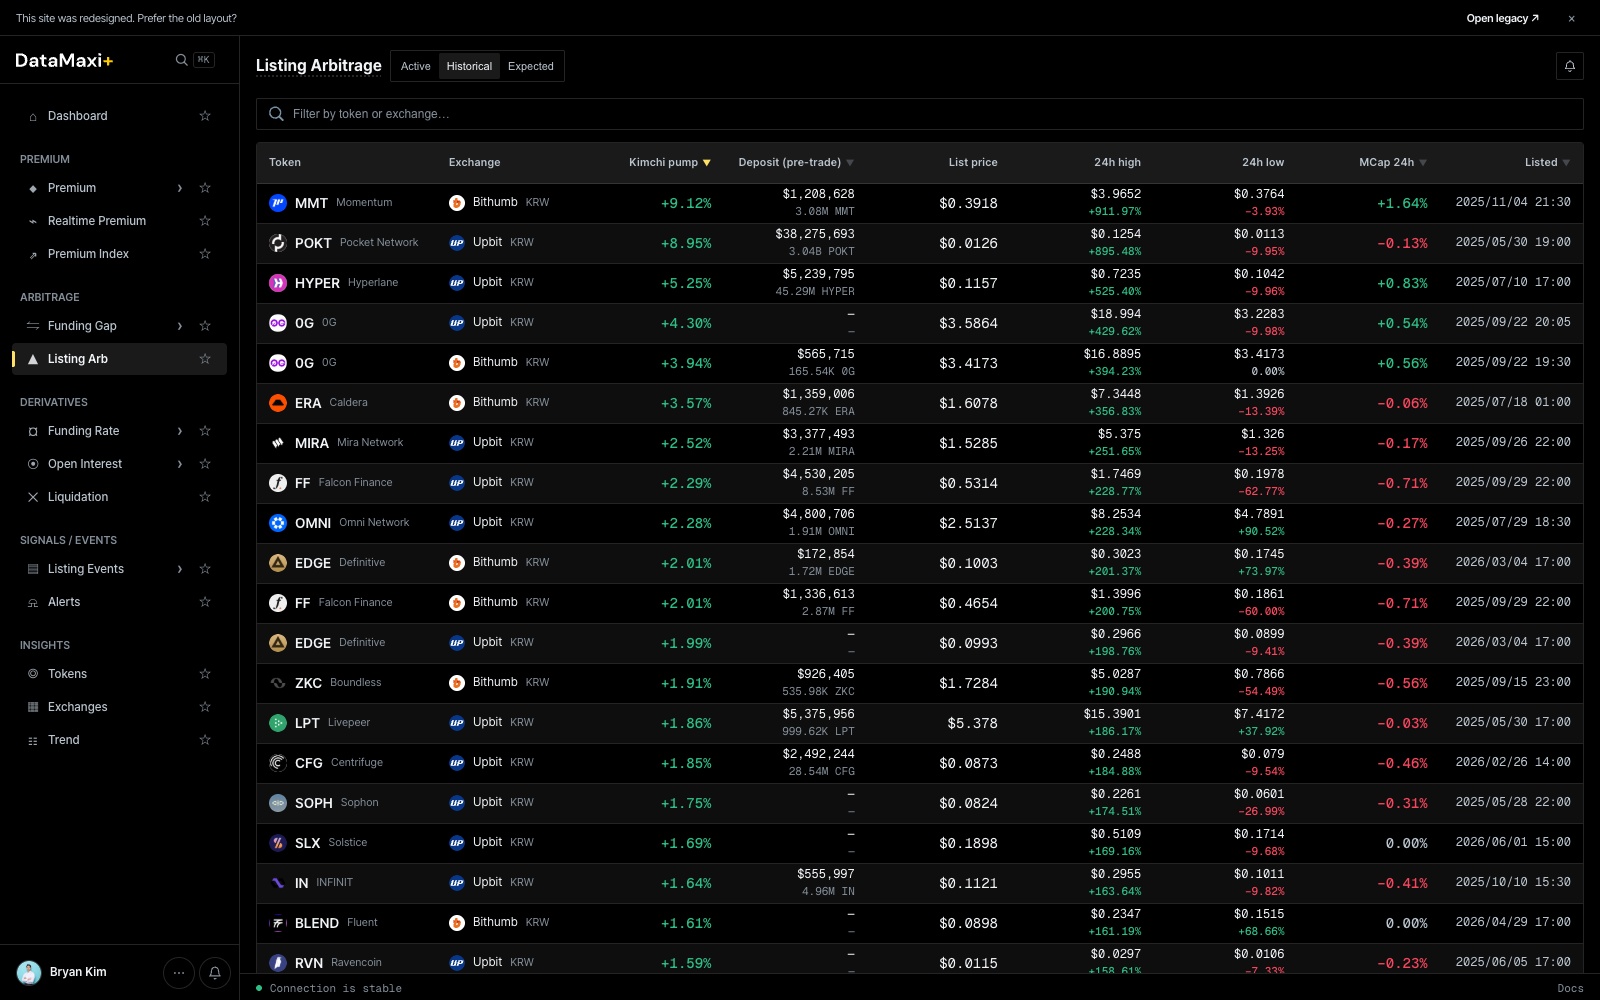
Click any historical row to open the per-event post-mortem (/listing-arbitrage/<venue>-<symbol>) — deposit status, opening price, spot + perp markets, funding strip, Telegram mentions. The single best place to learn what the next opportunity will look like.
Next steps
- Set an Alert so you don't have to keep DataMaxi+ open — Alerts → Create.
- Wire the same data into your own stack — API Getting Started for REST + WebSocket.
- Let an AI agent query the platform directly — MCP server.
- New to arbitrage as a concept? Read Arbitrage Basics first.